Channel Editor
The Channel Editor is used to create a new channel or edit an existing one.

Fields
1. Name - the name of the channel
2. Active - when checked, health care messages will be sent or received on this channel
3. Data Provider - fill this field, if your business requirements need to combine multiple channels under a single data provides
Channel Source
In the Source tab you can define how to read the incoming message and if any special action should be executed on every incoming message
1. Type - you can select the type of the channel
2. Data Type - you can select the data type to be used to parse the incoming messages
3. Folder - the folder to read new incoming messages.
Note that the folder is specific the selected HL7 v2.x File channel type. Other channel types may have other input parameters
4. Action - here you can check the actions which should be taken.
For example when Create Patient Document in checked, when a message is received it will trigger the creation of a new Patient Document and also the creation of a patient if the one from source is not identified in the database
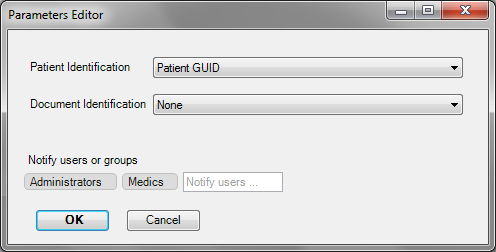
4.1. Action Properties - you can specify how a patient should be identified when the action is executed, and also which users or groups should be notified on successful execution

Channel Destinations
In the Destinations tab you can define the destinations of the channel. The destinations are where the messages in the Outbox are are written or sent
1. Name - optional name of the destination
2. Type - you can select the type of the channel
3. Data Type - you can select the data type to be used to parse the incoming messages
4. Folder - the folder to read new incoming messages
Note that the folder is specific the selected HL7 v2.x File channel type. Other channel types may have other output parameters
5. Content - check the content types which you want to sent over this channel