Resources
Resources are available under the Records tab. The ![]() button should be press in the ribbon.
button should be press in the ribbon.
This viewer's purpose is to easily manage the schedules of the resources. Typically you can register as resources objects, devices or rooms which are used by multiple users and they need scheduling. Resources can also be employees. Note that for employees you can create a user and a calendar in the system, and their schedules can be recorded in the Calendars
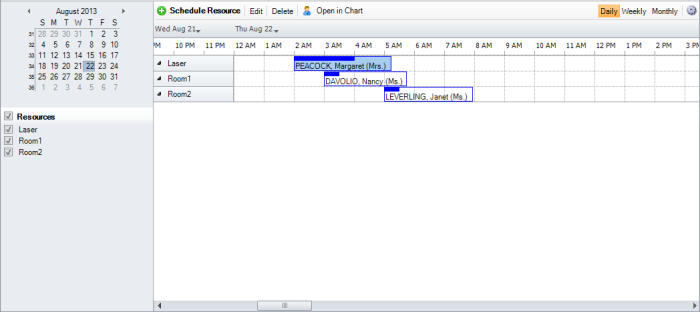
In the image bellow there are displayed the time lines for 3 resources. Each horizontal blue line in the time line represents the resources' scheduled period by a certain Calendar Event in the system. That can be extended by resizing the blue line, or the event can be moved to another resource by dragging it to another resource's slot.
It's important to note that you Calendars and Resources are linked together. When you schedule a resource from Resources it will appear in Calendar, and vice-versa when you schedule an event with Resources in Calendar it will appear in the Resources viewer. Also you can assign a resource to existing calendar events.

Filter Resources
Use the left sidebar to filter the resources to be displayed. You can filter by date or by resource name
Create and Manager Resources
Press the ![]() and then Resources Manager on the tool-bar
and then Resources Manager on the tool-bar

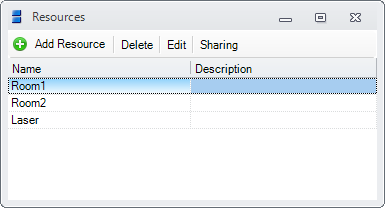
In the opened window press the ![]() button to add a new resource, or the Edit button to rename a resource.
button to add a new resource, or the Edit button to rename a resource.
Personalize the View
The Resources View can be changed in the following ways:
1. Using the buttons on the tool-bar
2. Press the ![]() on the tool-bar and change the Event Display mode or the Interval Width:
on the tool-bar and change the Event Display mode or the Interval Width:

Schedule Resource
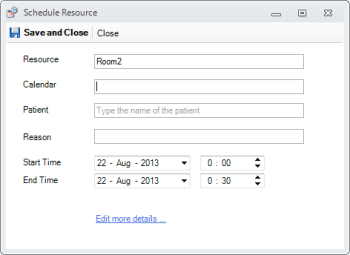
Double click on the time slot where you want to schedule a resource. The Schedule Resource Editor will open and you can select the calendar on which the resource will be scheduled and the time interval. Also you can enter the Patient and optionally the reason

Should you want to enter more details, like repeat events, click on the Edit more details link on the bottom of the window.
Change the resource's scheduled period or move the event to other resource
There are two ways to accomplish this:
1. Resize the blue line on the time line to extend the period. To move to other resource simply drag and drop the event into another resource slot.
2. The other way is right click on the event and select Edit. Use the Schedule Resource Editor explained above to make the changes
Jump to Patient Chart or Complete Event
1. Right click on the event and choose Open in Chart
2. Right click on the event and choose Complete Now. This will be available only if the event's interval includes the current time
Assign a resource to existing calendar Events
1. Go to Calendars in the main menu and edit an existing Event
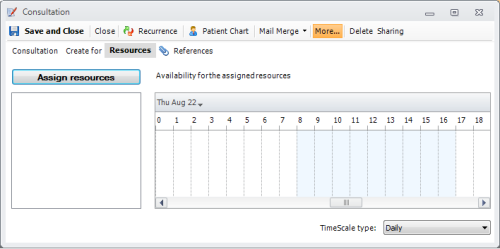
2. Make sure the More button is pressed and select the Resources tab

3. Press the Assign Resources button and choose the resources to be scheduled for this event
4. When done, press Save and Close. The event should now be visible in the Resources viewer, in the time slots of the selected event