4. Tutorial - Communication
Summary
Bellow are the steps to build and schedule an email campaigns that request for patients' appointments confirmation, one day before the appointment.
Once setup, this scheduled campaign will run automatically every day. Note that the program must be started and connected to the database for the emails to be sent.
3. Create the sending campaign
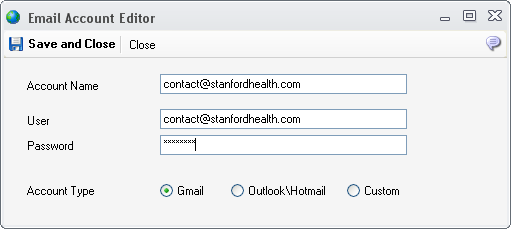
Go to Communication->Accounts and press New Account on the toolbar

In the opened editor, complete the fields with your SMTP email user and password settings. These will be saved encrypted to the database.
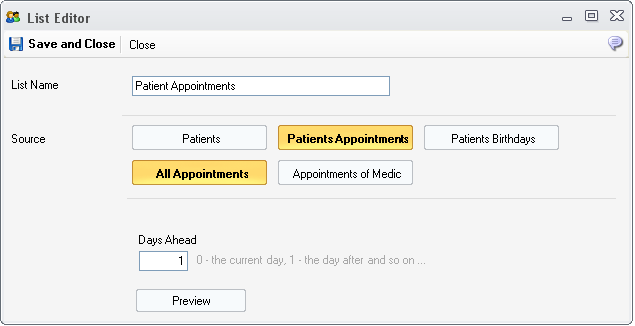
Go to Communication->Lists and press New

Check Patients Appointments and All Appointments.
Next, to build a list of patients with all appointments for the next day, enter 1 in the Days Ahead field
To test the list, press the Preview button
3. Create the sending campaign
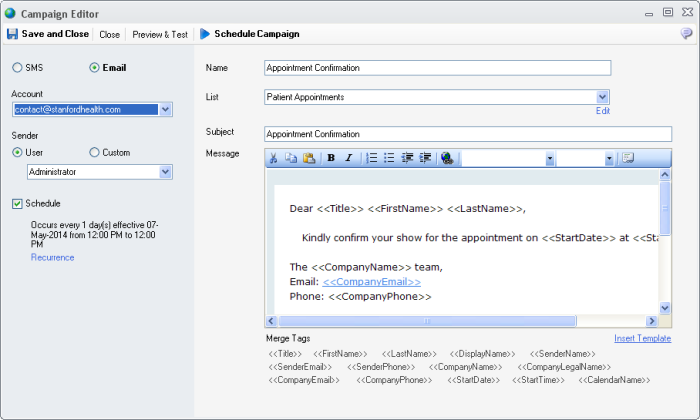
Go to Communication->Campaigns and press New Campaign

1. Check the Email radio box and in the Account field select the account created at point 1
2. Enter a campaign name in the Name field
3. In the List field select the list created at point 2
4. Enter a subject in the Subject field
5. Press the Insert Template and select the Appointment Confirmation Template. Feel free to change the layout to fit your needs
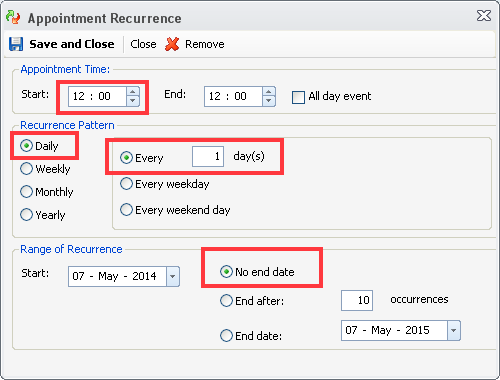
6. Check the Schedule check box and the press the Recurrence link. In the opened window choose as bellow and next press Save and Close

To test the campaign before scheduling, press the Preview & Test -> Send Test Email on the toolbar. Provide your email address and press the Send a Test button. Check if you have received email and if it's layout is OK
When done, press the Schedule Campaign and in the confirmation window press Schedule button.
You campaign was scheduled to run at the time specified in the recurrence.
To check how the sending went, go to the Logs section. Your stats on the Dashboard will also be updated.
|
|