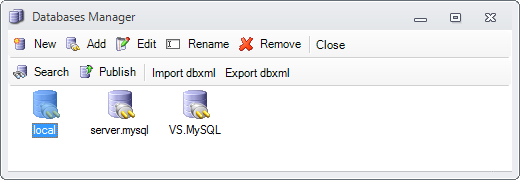
Databases Manager

Patient Manager \ Hospital Manager can connect to multiple databases. The place where these databases can be defined and organized is the Databases Manager window.
To open this dialog box, in the Login window, select the <Manage Databases...> in the Database combo box.
Add a New Database
1. Click the Add button on the tool-bar.
2. Use the Database Connection Wizard tool to define the new Database.
Search for Published Databases in LAN
1. Click the Search button on the tool-bar.
2. Select one Published Database from the list and click OK. Now you can connect to that database.
Editing a Database
1. Select a Database and click the Edit button on the tool-bar.
Renaming a Database
1. Select a Database and click the Rename button on the tool-bar.
Publish a Database in LAN
1. Select a Database and click the Publish button on the tool-bar. This action creates a public shared folder on your machine, that contains connection information to the selected Database. In case of Microsoft Access databases, the folder containing the Access file will also be shared in LAN.
Removing a Database
1. Select a Database and click the Remove button on the tool-bar.
For Microsoft Access databases the following actions are available:
Backup an Access Database
1. Right-click the Database and select Backup.
2. Type the name of the backup file in the File Name field and click Save.
Restore an Access Database
1. Right-click the Database and select Restore.
2. Select the backup file and click Open.
Optimize an Access Database
1. Right-click the Database and select Optimize.
Change the password for an Access Database
1. Right-click the Database and select Change Access Database Password.
2. Type valid password in the password fields and click OK.
Related
Installing MySQL in the network